The truth is, actually getting clean glass – glass that sparkles, that floods in the Arizona sunshine – takes more skill than acquiring base metal and a forge. We also want to warn you about a few common window cleaning sins, henceforth referred to as DIY window cleaning sins, which can ruin your efforts at success. These mistakes can easily happen whether or not you go and buy a commercial window cleaner from the grocery store or make your own.
Use this article as your escape from those pitfalls. We’re looking into the seven deadliest sins of DIY window cleaning and providing you with practical tips and simple homemade solutions to help you keep that crystal-clear view you have been desiring. It doesn’t take an expert to do a good job.
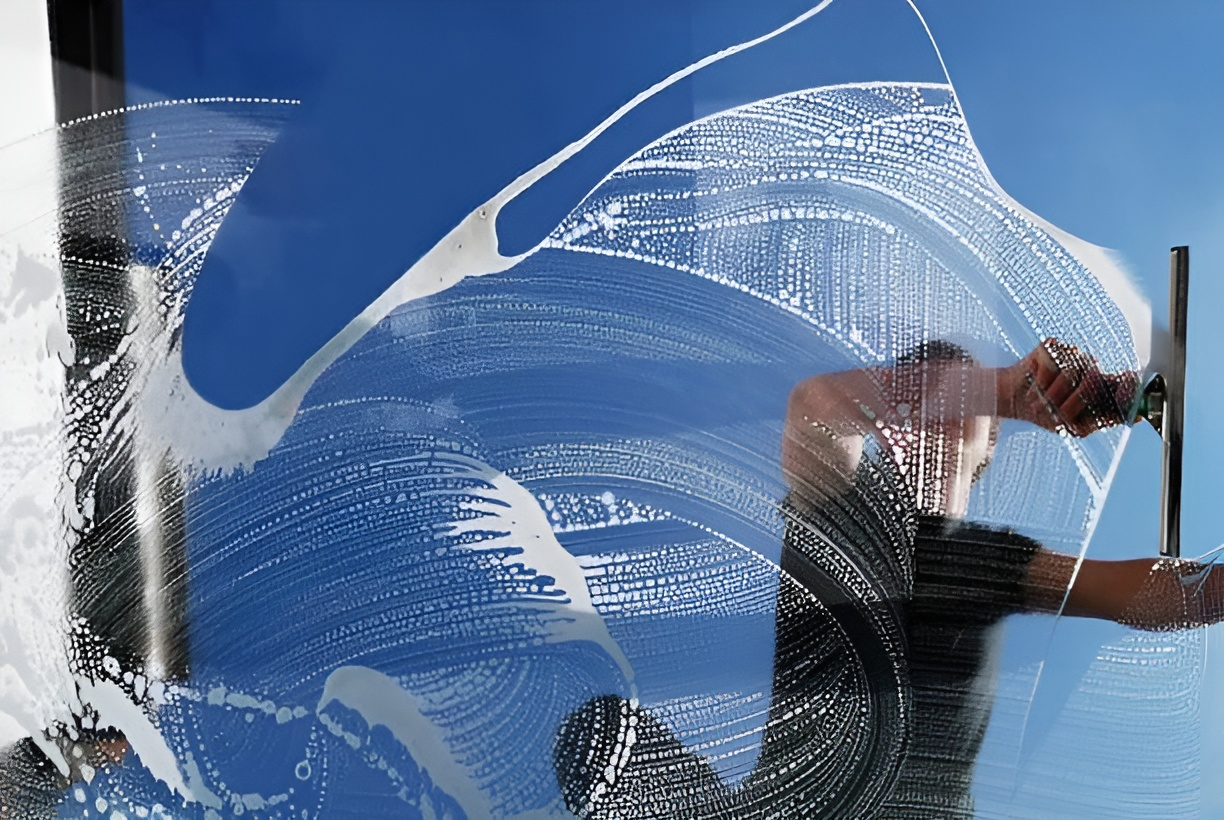
Therefore, let’s get started and get rid of the streaks! Here’s how to make the absolutely best homemade window cleaner and…
Sin #1: The Dish Soap Disaster
For instance, you might use dish soap, right? It’s right in your kitchen, it cuts through grease on your plates; why not on your windows? In fact, it feels like the most effective way to clean. We get it. I used to think this was a good window cleaning solution, especially when considering DIY window cleaning methods.
However, the big culprit in making those glass windows so stubbornly streaked? Dish soap. It can have consequences on your window surface and leave awful water spots.
Consider it this way: dish soap is intended specifically to break down food and oils, and it does it extremely effectively. However, that same ‘cleaning power’ ends up leaving its own residue on your glass—a thin film that is invisible at first but attracts all the dust and grime. It’s like a magnet for dirt! When that residue is combined with the mineral deposits often present in hard water (that’s Arizona for you), you have a cloudy, streaky mess. You’ll realize you’ve got clean windows, but in very short order you’ll see the problems.
Sin #2: The Vinegar-Only Venture (and the Essential Oil Overkill)
A strong first choice for a homemade window cleaner if you’re going the DIY window cleaning route will be a cup of white vinegar. It is cheap and readily available, and it does a good job of cutting through grime. Apple cider vinegar or lemon juice can even be used, and they all work on the same principle: the acid helps dissolve dirt. You’ll love it as a great homemade cleaner and one of the best homemade solutions out there.
But (and you always have the “but,” right?), vinegar is not always the final word. Its cleaning power is not quite enough if you are dealing with really stubborn dirt or grease on your windows. And the smell…well, it’s not even ‘fresh linen’.
And that is where the essential oil temptation begins. After all, if you use your favorite, say, lavender or lemon essential oil, a few drops can definitely make your DIY window cleaning solution smell better. This is a smart way to improve your own homemade window cleaner recipe. It has also been found that some oils, like tea tree, also have some antibacterial properties.
So where’s the problem?
Too much of a good thing. Essential oils are, would you believe it, oily. Add too much to your spray bottle, and you’re essentially replacing one kind of residue (soap) with another (oil). Yes, you have created your own cleaner, but it’s one that comes with a side of headaches.
Use your homemade glass cleaner in moderation. The vinegar is a base for your glass cleaning solution, not the entire solution itself. A good window cleaner recipe often involves a combination of ingredients for the best results.
Sin #3: The Paper Towel Problem
We’ve all done it. To dry and polish our just-washed windows, we reach for the roll of paper towels. Readily available, convenient, it’s what we use for other cleaning tasks; it sounds convenient.
However, one thing that pros know is that paper towels are a significant source of those pesky streaks. When doing DIY window cleaning, there are two main reasons why this happens:
- Fiber Shedding: Even the cheaper paper towels, in all likelihood, shed small fibers every time you use them. These fibers will stick to the wet glass and dry as visible streaks. You leave a tiny, fuzzy trail behind.
- Abrasiveness: Paper towels are somewhat abrasive. The good news is that you do not realize the micro-scratches from them immediately, but over time they can scratch the surface of the window and dull it, making it more difficult to clean in the future.
The Solution: Microfiber Cloths
To get the best results with DIY window cleaning, use a microfiber cloth. Tiny, split fibers within these cloths grab and trap dirt and moisture far more than paper towels. To ensure a streak-free shine, use a single microfiber cloth to apply the cleaning solution to the window, and then follow up with a dry microfiber cloth to buff it dry.
Be sure to wash your microfiber cloths regularly but avoid using fabric softener, as it leaves behind a residue that can defeat the purpose of your cleaning efforts.
Sin #4: The H2-Oh-No!
The water itself becomes important in window maintenance processes, although its basic nature may cause us to overlook it. Many people assume water is non-discriminating in every instance. I wish I had the ability to produce that buzzer sound with proper spelling. When it comes to DIY window cleaning, windows require specific water types when using window cleaners because the selected water makes an unexpected impact on cleaning results.
Almost every resident of Arizona experiences the challenges of having hard water. Minerals contained in the water are beneficial to rocks yet destructive to glass materials. Minerals such as calcium and magnesium in water create two problems: they leave unsightly marks and produce hazy streaks on window surfaces.
The Solution: Distilled Water
The solution? Distilled water. Water purification eliminates the problematic minerals from the source material. When you use DIY window cleaning solutions with distilled water, they help remove the main cause of streaks and spots, ensuring your solution cleans efficiently.
Water Temperature Matters Too
When it comes to DIY window cleaning, the temperature of the water is an important factor to consider. Warming the cleaning water brings optimal results. The process of grime and dirt removal becomes more efficient when using warm water instead of cold. But avoid hot water! Hot water disappears too fast in our dry environment to allow proper wiping since it evaporates before you can complete the task. Your window cleaning solution should always be at a temperature that falls between warm and cold but settles perfectly in the middle. A balanced water temperature serves as the perfect solution for achieving spotless windows.
You should focus on the H2O when preparing your window cleaning solution. The water temperature plays a significant role in producing glass that shines without streaks.
Sin #5: The Spray Bottle Blunder
Now we know we have to get rid of the dish soap and limit the use of vinegar, along with using a microfiber cloth and considering the water we use. Even if we have all of those steps right, without the right tool for applying our window cleaner recipe, all those steps are for nothing. The bottle you choose and, most importantly, how you use it matter greatly in keeping your glass clean. For DIY window cleaning, most important is the quality of the spray. Choose a bottle that gives a fine, even mist. The homemade glass cleaner will be too concentrated in some areas and too thin in others if the stream or the droplets are not even. That translates into—you guessed it—streaks.
No matter how good your spray bottle is, you should never oversaturate the window surface. You need only a very light, even misting. Drenching the glass simply does not mean that the glass will now be cleaner; it only means that there will be more liquid than before to wipe off, potentially leading to streaks, and wasting your effective cleaning agent.
It’s like putting on perfume or cologne: a spritz here and there is classy; deadening the air with half a bottle is overpowering. As with glass cleaner, the same principle applies.
Therefore, pick an appropriate spray bottle which produces a fine mist, and refine the art of application to a degree of subtlety.
Sin #6: The Neglected Extras (Screens and Shower Doors)
Well, you have the art of cleaning window panes down to a science… Congratulations! Before you say you blew it, there are a couple of often-neglected areas you may want to consider that will affect your overall view: clean window screens and clean shower doors.
So, in other words, your window screens are the first line of defense against Arizona dust, pollen, and Arizona bugs. They do a good job, but all that grime builds up over time and blocks light and airflow. Dirty screens make even clean windows look dingy.
Thankfully, cleaning screens is quite simple. Take them out of the window frame, thoroughly soak them, and add a tiny bit of the cleaner you just finished making (the vinegar-based one we discussed above works wonders). For those who enjoy DIY window cleaning, use a soft brush to gently scrub the grime away without ripping the screen. A thorough rinse and complete drying are needed before reinstalling them. You will be amazed at the amount of light that you will bring back.
And what about shower doors? They’re more or less vertical windows, subject to exactly the same hard water spots, soap scum, and streaks. This is the same thing; stay away from harsh chemicals, use a microfiber cloth, and if you have a glass cleaning solution for shower doors (and you’re open to them in general), then use that; otherwise, trust your trusty (useful) vinegar mix. This will prevent deposits and keep your bathroom sparkling bright and fresh. The reality, after all, is that these are glass surfaces that need care.
Sin #7: The Razor Blade Recklessness
You are looking at a stubborn speck of paint, a dinged-up sticker, or some other hardened gunk that is on your otherwise pristine glass, and you find yourself tempted: by the razor blade. It will do a good job quite quickly, won’t it?
Now comes a strong word of caution. A razor blade is fine if you have very experienced hands, for example, like a professional window cleaner, but as an average DIYer, this is a disaster waiting to happen. This is why DIY window cleaning requires more care and attention.
Thus, what then should you do? The key to it is working with patience and having the right tools. For dried-on paint, you should soak a cloth in warm water and lay it against the spot for several minutes to soften the dried paint. Then, gently try to rub it away with a microfiber cloth. There are specialized adhesive removers for glass at most hardware stores that are much safer for removing individual sticker residue.
And the takeaway: Don’t cave in to the desire to use a razor blade. There is simply too much risk of damaging your windows. Contrary to what you might believe, the pros, like us at Arizona Window Washers, have safe and specialized tools and techniques to take care of these situations. You can trust us to get the good job done and to give you truly clean glass.
Achieving Window Washing Nirvana
We’ve covered the seven deadly sins of DIY window cleaning – from dish soap streaks to razor blade risks. Remember, sparkling windows are about the right techniques and ingredients, like a good microfiber cloth and distilled water in your homemade cleaner.
Of course, you can tackle it yourself, armed with your spray bottle and window cleaner recipe.
Or…
…you can skip the hassle and let Arizona Window Washers make your windows shine! We’ve got the expertise and the tools to guarantee a streak-free finish, safely and efficiently.
Call us at (480) 335-7373 or visit our homepage for a free quote! Let the pros do a good job.
Enjoy the Arizona sunshine through truly clean windows – however you get there!