Window washing mastery starts with understanding why streaks form and which techniques consistently deliver clear, lasting glass. This guide teaches homeowners the practical mechanics behind streak-free window washing, including tool selection, professional squeegee methods, solution choices, and Arizona-specific hard water management. Readers will learn step-by-step squeegee technique, which cleaning solutions perform best for residential glass, and how to remove and prevent mineral deposits common in Phoenix-area homes. Practical sections explain safety, seasonal scheduling, and when to tackle jobs yourself versus calling a pro, while short comparison tables help you decide on tools and treatments. Throughout the article you’ll find lists, EAV comparison tables, and pro tips that translate expert window-cleaning logic into repeatable routines homeowners can apply immediately. By the end, you’ll have an actionable plan to keep interior and exterior glass spotless and longer-lasting in a dry, dusty climate.
What Are the Essential Tools for Mastering Residential Window Washing?
Essential tools are the foundation of streak-free results because each item performs a distinct cleaning role: agitation, rinsing, squeegeeing, and detailing. Choosing the right squeegee width, a quality scrubber, a grit-guarded bucket, and soft microfiber cloths ensures efficient soil removal and minimal re-deposition, which directly reduces streaking and scratching. Good tools also reduce time and physical strain, enabling homeowners to work safely and systematically across multiple windows. Below is a concise list of core tools most homeowners need, followed by a comparison table to clarify use-cases and trade-offs.
A short checklist of essential tools:
- Squeegee: For controlled water removal and streak-free drying.
- Scrubber (strip washer): For loosening dirt and applying solution safely.
- Bucket with grit guard: For clean solution retention and blade protection.
- Microfiber cloths and towels: For edge detailing and lint-free buffing.
- Extension pole and stabilizing ladder: For reach while maintaining safe posture.
These essentials form the baseline kit; understanding their differences helps you match tool size and material to window type and height, which leads directly into squeegee selection and blade maintenance best practices.
Which Squeegee Types and Sizes Deliver the Best Results?

A squeegee is defined by head width and blade material, and both determine how effectively it removes water without streaks. Narrow heads (6–10 inches) work best for small panes and tight frames, while wider heads (14–18 inches) speed work on large picture windows; rubber durometer (blade hardness) affects conformability and contact with glass. For many homes, a 10–14 inch head with a medium-durometer rubber balances reach and edge contact, delivering reliable wiping across single- and multi-pane windows. Replace blades at the first sign of nicks and keep spare rubber blades on hand to maintain consistent pressure and edge quality.
Pro tip: store blades flat and rinse after use to prevent debris embedding, which prolongs blade life and preserves streak-free performance.
This maintenance detail naturally leads into how buckets, scrubbers, and microfiber techniques complement squeegee performance.
How Do Buckets, Scrubbers, and Microfiber Cloths Enhance Cleaning?
Buckets and scrubbers provide controlled agitation and safe solution application, and microfiber cloths finish the job by removing residual film and polishing edges. A two-bucket setup—one with clean rinse water and one for solution—is ideal for heavy soils; using a grit guard prevents abrasive particles from contaminating your wash water and scratching glass. Scrubber materials range from soft nylon sleeves for delicate glass to heavier poly for stubborn grime, and selecting the right sleeve depends on soil level and coating sensitivity.
Microfiber cloths are crucial for the final buff: they absorb residue without leaving lint, and folded properly can create several clean surfaces for detailing. Proper staging of buckets and cloths minimizes cross-contamination and prepares you to execute the professional squeegee sequence described next.
What Safety Equipment and Practices Should Homeowners Use?
Homeowner safety emphasizes fall prevention, eye protection, and safe chemical handling, particularly when working on exterior windows or multi-story homes. Use a stable ladder positioned at a 75-degree angle, wear slip-resistant footwear, and use eyewear when applying acidic or concentrated cleaners; have a helper stabilize the ladder if possible.
Avoid overreaching—move the ladder or use a secure extension pole—and stop work if wind or surface conditions feel hazardous.
A short ladder-safety checklist helps reduce incidents:
- Inspect ladder condition
- Verify ground stability
- Maintain three points of contact
- Do not stand on top rungs
Recognizing limits and hazards prepares the homeowner to either finish safely or escalate to a trained, insured professional for complex or high-risk jobs.
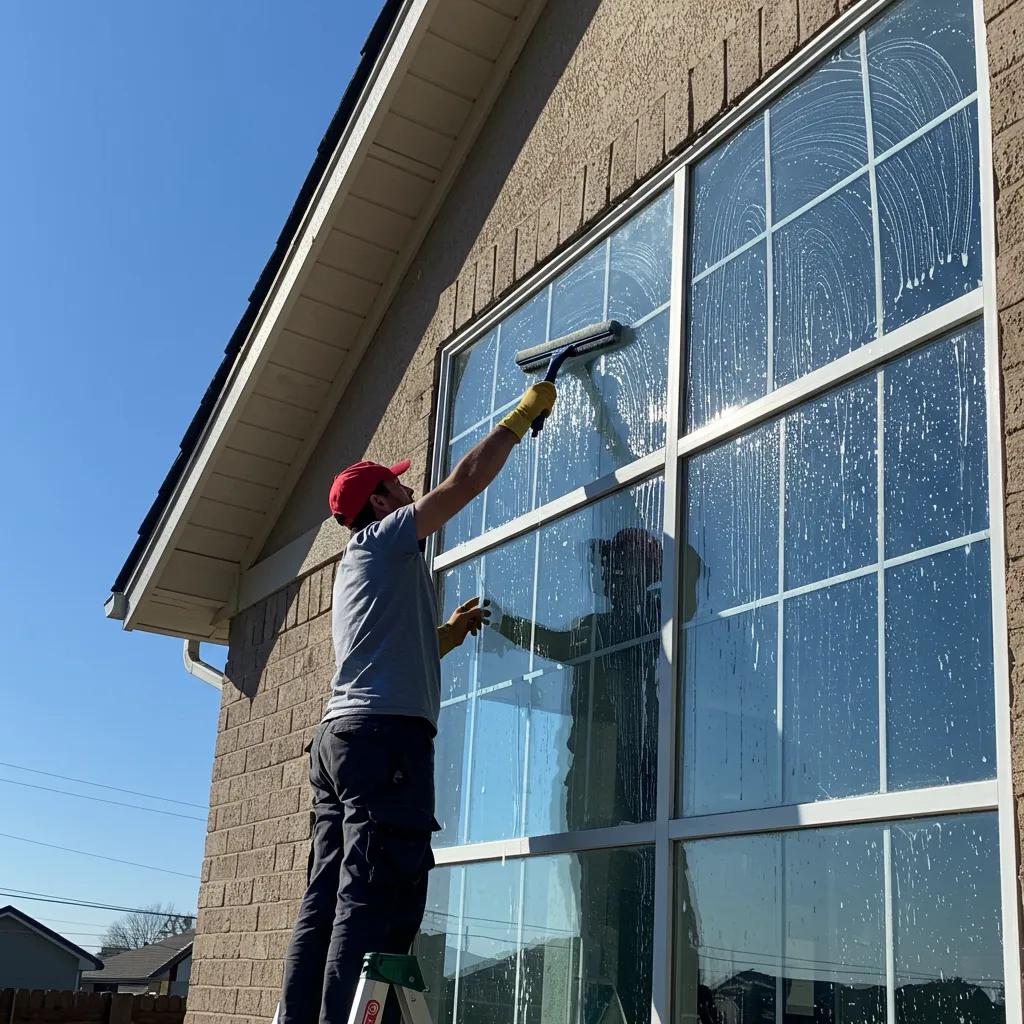
How Do Professional Window Cleaning Methods Achieve Streak-Free Windows?
Professional workflows deliver streak-free windows by combining pre-rinse, agitation, an optimized squeegee sequence, and detailed edge finishing that together eliminate common causes of streaking. Professionals control water quality, overlap strokes precisely, and finish with lint-free detailing that prevents re-deposition of dissolved minerals or soap film. Understanding the logic behind each step helps homeowners replicate reliable results and decide which jobs warrant a specialist.
Below is a step-by-step squeegee technique homeowners can adopt to mimic professional results.
- Pre-rinse the glass to remove loose grit and reduce abrasion.
- Apply solution with a scrubber to break adhesion of dirt and deposits.
- Use a squeegee at a 30–45° angle with uniform pressure, overlapping strokes by ~25%.
- Wipe the blade between passes and detail edges with microfiber to remove remaining film.
These steps prioritize removing contaminants before water removal, and mastering them leads naturally to understanding how cleaning solutions and wax additives extend the clean period.
After learning professional technique, it’s useful to see how real providers implement these steps. Arizona Window Washers, operating in the Phoenix metro area including Scottsdale, follows a professional process that maps closely to these methods: technicians hand-wash glass, use a squeegee process with a protective wax additive that repels dirt for up to six months, and apply top-quality cleaning solutions. Their service scope includes interior and exterior glass cleaning, screen cleaning, track brushing, sill wiping, and frame wiping, with options for hard water spot removal and flexible scheduling. This real-world example shows how technique plus protective treatments adds value and convenience for homeowners.
What Is the Step-by-Step Squeegee Technique for Spotless Glass?
The squeegee technique begins with consistent stroke mechanics: set the blade angle to roughly 30–45 degrees, use firm but even pressure, and overlap each pass by about 20–30% to avoid missed strips. Start at the top corner and pull downward in straight, deliberate strokes, wiping the blade after each pass to prevent streak transfer. For wide panes, use a reverse S pattern—first vertical outer strokes then a horizontal finish—to manage runoff without leaving ridges.
Common errors include rocking the blade, inconsistent overlap, and failing to wipe the blade between passes; correcting these eliminates most streaks. Mastery of the squeegee stroke naturally leads to attention to solutions and additives that preserve results longer.
How Do Cleaning Solutions and Wax Additives Improve Longevity?
Cleaning solutions remove soils and soften mineral films, while wax additives create a hydrophobic barrier that repels dirt and reduces how quickly windows appear dirty again. Detergent choice affects how easily residue rinses off and how compatible the solution is with subsequent protective treatments; a balanced, low-foaming detergent with corrosion inhibitors preserves seals and frames. Wax additives bond to the glass surface to form a thin protective layer, slowing re-soiling and making routine rinses more effective.
Professionals and many homeowners prefer low-residue, eco-minded detergents paired with wax additives for long-lasting clarity; Arizona Window Washers cites a wax additive that can repel dirt for up to six months as part of their standard process. Understanding chemical compatibility and application technique ensures protective treatments enhance, rather than compromise, glass performance.
How Are Window Frames, Screens, and Tracks Properly Cleaned?
Frames, screens, and tracks require separate tactics to avoid cross-contamination and maintain seals: screens are typically removed and rinsed gently to dislodge trapped dust, frames are wiped with a damp, non-abrasive cloth, and tracks are brushed to remove grit before a final vacuum or wipe. Avoid soaking frames with excess water to protect weatherstripping and finishes; instead, use targeted agitation and immediate drying.
For tracks, a narrow brush pairs with a small vacuum or compressed air to lift debris before a light wash and wipe. Proper sequencing—screens out first, tracks brushed, frames wiped last—prevents recontaminating cleaned glass and readies windows for the squeegee sequence already discussed. These detailed steps reduce repeat work and protect window hardware over time.
What Are the Best Window Cleaning Solutions for Residential Use?
Choosing the right cleaning solution balances effectiveness, safety, and long-term compatibility with glass and surrounding materials. Eco-friendly commercial detergents, quality commercial blends, and well-formulated homemade mixes each have roles: eco-friendly options reduce chemical exposure, commercial detergents handle heavy grime, and homemade solutions offer cost-effective maintenance between deep cleans. The table below compares typical solution choices across effectiveness, safety, cost, and hard-water suitability to help homeowners choose.
| Solution Type | Effectiveness | Safety | Cost |
|---|---|---|---|
| Eco-friendly commercial | Good on light-to-moderate grime; low residue | High safety for plants/people | Moderate |
| Commercial detergent blends | High on heavy grime and grease | Moderate; rinse required | Higher |
| Homemade vinegar/dish soap mix | Good for light film; inexpensive | Safe when diluted; acidic | Low |
| Wax additive (protective) | Low cleaning power; high protective value | Moderate; follow instructions | Moderate |
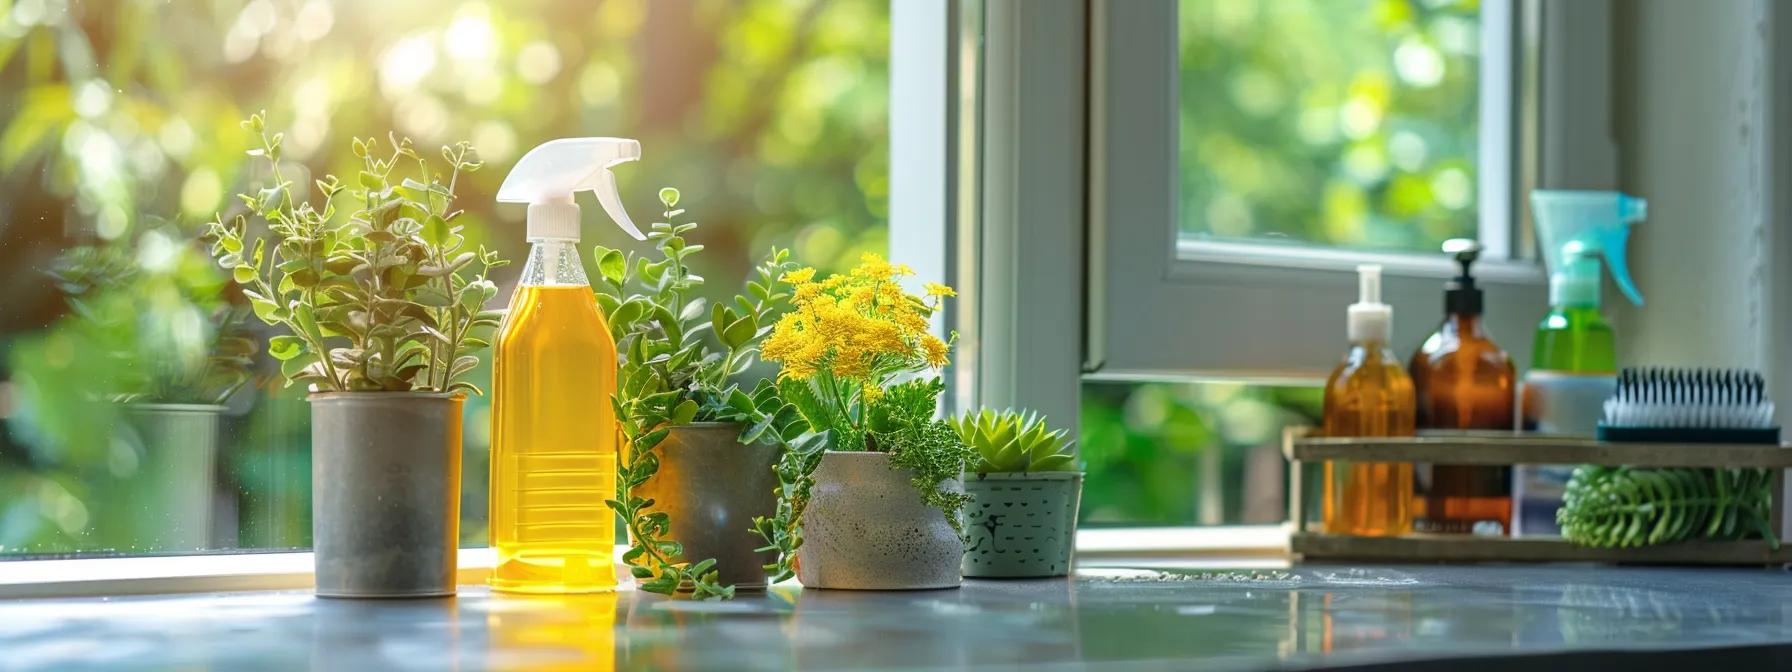
Which Eco-Friendly Cleaning Products Are Most Effective?
Eco-friendly cleaners typically rely on biodegradable surfactants and low-odor solvents that cut grime without harsh acids or high VOCs, making them appropriate for interior work and homes with plants or pets. Look for products labeled biodegradable, phosphate-free, and low-residue; these formulations rinse clean and minimize film, which helps the squeegee perform better. While eco options sometimes need more agitation for heavy mineral deposits, their safety profile makes them ideal for regular maintenance.
Choosing an eco-friendly product for routine cleaning reduces exposure and pairs well with periodic deeper treatments to address stubborn stains. That balance frames how homemade mixes compare to commercial detergents.
How Do Homemade Solutions Compare to Commercial Detergents?
Homemade mixes—commonly water with a dash of dish soap or a mild vinegar solution—are inexpensive and effective for light soils and quick interior touch-ups, but they may leave residues if not properly rinsed. Dish soap helps break oils; diluted white vinegar dissolves light mineral films, yet vinegar acidity can be too strong for some frame finishes if overused. Commercial detergents are formulated to balance cleaning power and rinsability, handling heavy grime and road film that homemade mixes struggle with.
For most homeowners, a combination strategy works: use homemade or eco-friendly cleaners for frequent maintenance and reserve commercial detergents for seasonal deep cleans or stubborn deposits.
What Are the Benefits of Wax Additives in Window Cleaning?
Wax additives create a thin, hydrophobic surface layer that repels water, slows dust adhesion, and reduces how often windows need heavy cleaning—benefits especially valuable in dusty, dry climates. Applied by professionals or as a final treatment after cleaning, wax additives transform rinse behavior so water beads and runs off rather than forming mineral streaks. Typical longevity varies, but professional-grade additives can extend visual cleanliness for several months under normal conditions.
Careful application and compatibility checks with glazing types are important; when used correctly, protective additives reduce long-term maintenance and improve homeowner satisfaction between professional visits.
How Can Homeowners Remove Hard Water Stains from Windows Effectively?
Hard water stains form when mineral-laden water evaporates and leaves crystalline deposits, primarily calcium and magnesium, that bond to glass. Effective removal requires breaking the mineral bond with chelating or acidic agents, followed by mechanical agitation to lift residue without scratching. A safe, staged approach—diagnose, treat with the right chemistry, and finish with protective treatment—restores clarity and reduces recurrence.
Follow this simple 3-step removal method for most residential hard water stains:
- Identify the deposit: test an inconspicuous area with a vinegar wipe to confirm mineral residue.
- Apply a safe acidic or chelating cleaner per instructions and allow dwell time for mineral dissolution.
- Agitate gently with a soft scrubber, rinse thoroughly, and finish with a protective coating or wax additive.
This problem-solution flow helps homeowners decide between DIY treatment and professional remediation when needed.
What Causes Hard Water Spots in Phoenix Residential Windows?
In Phoenix and surrounding areas, hard water spots often result from irrigation overspray, pool splash, and mineral-rich tap water that evaporates on glass surfaces, leaving calcium and magnesium salts. The arid climate accelerates evaporation, concentrating deposits and making spots appear more quickly than in humid regions. Recognizing hard water involves testing with a mild acid (vinegar)—if mineral scale dissolves, the deposit is hard water rather than surface dirt.
Correctly diagnosing deposits prevents ineffective cleaning attempts and guides homeowners to appropriate chemical treatments or professional hard water spot removal services.
Which Chemical Treatments Safely Remove Hard Water Stains?
Safe chemical options include mild acidic cleaners (citric or acetic acid solutions) and proprietary chelating agents formulated for glass; these dissolve mineral salts without etching when used as directed. Always test a small area first, use PPE like gloves and eyewear, and neutralize or rinse thoroughly to stop ongoing chemical action. For heavy, bonded scale, specialized commercial removers often include surfactants and inhibitors that improve wetting and prevent glass damage during agitation.
Following label instructions and combining chemical dissolution with gentle mechanical action yields reliable removal while minimizing risk to frames and seals.
Arizona Window Washers offers hard water spot removal as an advanced treatment option for homeowners dealing with severe mineral buildup; their process includes targeted chemical application and mechanical removal performed by trained, insured staff for safer, longer-lasting outcomes.
How Can Hard Water Stains Be Prevented Long-Term?
Prevention focuses on minimizing mineral contact, rinsing regularly, and applying protective treatments that reduce adhesion of deposits. Practical steps include redirecting irrigation away from windows, using filtered water for final rinses when possible, scheduling periodic rinses after monsoon dust or irrigation cycles, and applying a professional-grade wax additive to reduce mineral bonding. Establishing a maintenance cadence—light rinsing monthly with deep cleaning seasonally—keeps deposits from becoming bonded scale.
Preventative routine and protective coatings together reduce the frequency of heavy remediation and preserve glass clarity over time.
When and How Often Should Residential Windows Be Cleaned for Best Results?
Optimal cleaning frequency depends on exposure, climate, and aesthetic expectations; in Arizona, seasonal events like spring pollen and monsoon dust warrant targeted scheduling. A basic recommendation balances light maintenance with deeper cleans after heavy seasonal events and aligns with homeowner tolerance for film and reduced light transmission. The short schedule below helps homeowners decide when to act.
Seasonal cleaning cadence for Arizona homes:
- Spring: Deep clean to remove winter grime and pollen buildup.
- Pre-monsoon and post-monsoon: Wash after dust storms and once more following heavy rains that leave mineral deposits.
- Routine maintenance: Light rinses or spot cleaning every 1–3 months depending on exposure.
These timing guidelines reflect local conditions; next, consider how dust and weather specifically influence how often to clean.
What Seasonal Cleaning Schedules Work Best in Arizona’s Climate?
Arizona homeowners benefit from a three-tier schedule: a spring deep clean, targeted post-monsoon maintenance, and light interim upkeep during the dry season. The spring session removes accumulated pollen and settled dust from winter months, while post-monsoon cleans address water spots and grime tracked by storms. Between these, quick rinses or interior spot cleaning every few months keep windows presentable and reduce the workload for deep cleans.
Aligning cleaning with predictable seasonal patterns reduces chemical use and preserves glass and frame integrity over the long term.
How Do Dust and Weather Affect Window Cleaning Frequency?
Frequent dust, irrigation spray, and pollen accelerate film build-up, and wind events can deposit abrasive grit that scratches if not removed correctly; these factors shorten the interval between effective cleans. Visual cues—diminished light transmission, a noticeable film, or fine abrasive residues—indicate it’s time to clean. Homes near active landscaping or dusty streets often require more frequent attention than sheltered properties.
Monitoring visual indicators lets homeowners shift from scheduled maintenance to targeted cleaning when environmental triggers demand it.
What Are the Advantages of Regular Professional Window Washing?
Regular professional washing saves time, reduces the risk of damage from improper techniques, and often delivers longer-lasting results due to advanced treatments and protective additives. Professionals bring specialized tools, water-quality awareness, and treatments like wax additives that extend cleanliness, which can lower total lifetime maintenance costs. Additionally, scheduled service plans remove the decision friction for busy homeowners and ensure proactive protection against long-term surface degradation.
What Are the Pros and Cons of DIY Window Washing vs. Professional Services?
DIY window washing is cost-effective for single-story homes and light maintenance but requires time, correct tools, and safe practices; professionals provide faster, more durable results and handle difficult jobs or hard water remediation safely. This comparison table breaks down the trade-offs across time, cost, safety, result longevity, and hard water capability to help decision-making.
| Approach | Time Investment | Cost | Safety | Longevity of Results |
|---|---|---|---|---|
| DIY (single-story) | Moderate to high | Low (tools/supplies) | Higher personal risk on ladders | Short to medium |
| DIY (multi-story) | High and risky | Higher if renting gear | Significant safety concerns | Short to medium |
| Professional service | Low homeowner time | Starting from $125 for basic residential washes | Low homeowner risk; insured staff | Long (with additives) |
What DIY Techniques Can Homeowners Safely Use?
Safe DIY techniques emphasize reachable windows, correct equipment, and conservative chemical choices: use a medium squeegee, a soft scrubber, diluted eco-friendly solution, and avoid standing on unstable surfaces. For single-story homes, stage your tools, pre-rinse to remove grit, and follow the squeegee sequence to limit rework. Always prioritize safety—if you need to exceed safe reach or work from awkward angles, consider calling a professional.
These safe DIY tactics let homeowners manage routine maintenance while reserving high-risk or heavy-remediation tasks for professionals.
How Do Professional Services Ensure Superior Results and Convenience?
Professionals deliver superior results through training, insured teams, and specialized tools—such as purified water systems, industrial-grade detergents, and protective wax additives—that extend cleanliness and reduce re-clean frequency. They follow standardized workflows: pre-cleaning, agitation, squeegee sequencing, and edge detailing, plus targeted services like hard water spot removal and track cleaning. Scheduling flexibility and guarantees add convenience and peace-of-mind for homeowners seeking reliable outcomes.
Arizona Window Washers emphasizes trained, insured staff, competitive pricing (often stated as about 5% less than other companies with residential starts from $125), flexible scheduling (one-time, annual, biannual, quarterly, monthly), and a free online quote tool—attributes homeowners use when weighing professional convenience and value.
How Does Pricing Compare Between DIY and Hiring Experts?
DIY costs include initial tool purchase and ongoing supplies; professionals offer economies of scale for one-off or recurring jobs and save homeowner time. A practical example: starting professional residential window washing often listed at $125 covers labor, tools, and typical services like interior/exterior glass cleaning, screen cleaning, track brushing, sill wiping, and frame wiping—costs that can exceed DIY when factoring in time, ladders, and the need for specialized hard water removers. When hard water remediation or protective additives are required, professional pricing can represent better long-term value.
Comparing out-of-pocket cost to time and risk often reveals professional services as a cost-effective solution for many homeowners.
How Can Homeowners Ensure Safety and Efficiency While Washing Windows?
Safety and efficiency combine by planning, choosing ergonomic tools, and using staging and sequencing to minimize movement and rework. Proper preparation—removing obstacles, pre-rinsing, and laying out tools—reduces time on ladders and accelerates workflow. Employing extension poles, batching similar windows, and maintaining a clean blade between strokes replicate pro efficiencies while keeping homeowners safe.
Next are specific ladder and ergonomic practices to reduce physical risk while maintaining cleaning quality.
What Ladder and Ergonomic Practices Reduce Risk?
Ladder safety requires correct angle, stable footing, and body positioning to reduce falls and strains: set the ladder at a roughly 75-degree angle, verify ground stability, keep hips between rails, and avoid twisting motions while working. Wear supportive, slip-resistant shoes and take frequent short breaks to reduce fatigue and improve posture. When tasks demand reach beyond safe limits, use secure extension poles or call a trained professional.
What Time-Saving Techniques Do Professionals Use?
Professionals stage equipment to limit trips, batch similar window types to reuse settings, and sequence work from top to bottom and exterior to interior to control runoff and prevent rework. Using extension poles, telescoping tools, and dual-bucket setups lets teams move quickly while maintaining quality. Homeowners can emulate these tactics by preparing all tools in advance, grouping windows by exposure, and using a ladder only when necessary.
How Can Proper Preparation Improve Cleaning Outcomes?
Preparation includes removing obstructions, pre-rinsing to dislodge loose dirt, and protecting nearby surfaces; these steps reduce streaking and prevent abrasive damage. A pre-clean checklist—clear obstacles, inspect frames and seals, pre-rinse, stage tools, and secure ladder—ensures the cleaning session proceeds efficiently and safely. Proper preparation also reduces chemical exposure and the likelihood of needing repeat passes, leading to better long-term outcomes.
Thorough preparation completes the workflow loop from diagnosis to protection, and for homeowners ready to delegate, it clarifies when professional expertise offers the best value.
For homeowners seeking professional assistance or convenience, Arizona Window Washers provides flexible scheduling, a free online quote tool, and trained, insured staff reachable by phone at (480) 335-7373. Their residential process includes hand washing, squeegee finishing, protective wax additive application, screen and track detailing, and optional hard water spot removal—services that combine safety, efficiency, and longer-lasting results for busy homeowners.
Frequently Asked Questions
What are the best practices for maintaining window cleaning tools?
To ensure your window cleaning tools remain effective, regular maintenance is essential. After each use, rinse squeegee blades and scrubber sleeves to remove dirt and debris, preventing buildup that can lead to streaks. Store squeegees flat to avoid bending the blades, and keep microfiber cloths clean and dry to maintain their lint-free quality. Periodically inspect tools for wear and replace any damaged components, such as worn squeegee blades, to ensure optimal performance during your next cleaning session.
How can I tell if my windows need cleaning?
Indicators that your windows need cleaning include reduced light transmission, visible dirt or streaks, and the presence of dust or grime on the glass surface. If you notice a film or haze that obscures your view, it’s time to clean. Additionally, environmental factors such as pollen, dust storms, or recent rain can accelerate the need for cleaning. Regularly assessing your windows, especially after seasonal changes, will help maintain their clarity and appearance.
What should I do if I encounter stubborn stains during cleaning?
For stubborn stains, such as hard water spots or mineral deposits, start by identifying the type of stain. Use a mild acidic solution, like vinegar or a commercial hard water cleaner, to dissolve the mineral buildup. Apply the solution and let it sit for a few minutes to penetrate the stain. Then, gently scrub with a soft cloth or scrubber to lift the residue. Rinse thoroughly and follow up with a protective wax additive to prevent future stains.
Are there specific times of year that are best for window cleaning?
Yes, the best times for window cleaning often align with seasonal changes. In Arizona, spring is ideal for a deep clean to remove winter grime and pollen. Following monsoon seasons, it’s beneficial to clean windows to address any dust or mineral deposits left by rain. Regular light maintenance every 1-3 months can help keep windows clear between these deeper cleans, ensuring optimal visibility and aesthetics throughout the year.
How can I safely clean windows on multi-story homes?
Cleaning windows on multi-story homes requires extra caution. Always use a stable ladder positioned at a safe angle, and consider using extension poles to reach higher windows without overreaching. If the height is significant or if you feel uncomfortable, hiring a professional service is advisable. They have the training and equipment to safely clean high windows, reducing the risk of accidents and ensuring thorough cleaning without compromising safety.
What are the environmental benefits of using eco-friendly cleaning solutions?
Using eco-friendly cleaning solutions minimizes chemical exposure to both people and the environment. These products typically contain biodegradable ingredients that break down naturally, reducing pollution and harmful runoff into local waterways. Additionally, they are often safer for use around pets and plants, making them a responsible choice for homeowners. By opting for eco-friendly options, you contribute to a healthier ecosystem while still achieving effective cleaning results.
How can I improve the efficiency of my window cleaning routine?
To enhance the efficiency of your window cleaning routine, start by preparing your workspace. Gather all necessary tools and solutions before beginning, and stage them for easy access. Use a two-bucket system to separate clean and dirty water, and work from top to bottom to control runoff. Batch similar window types together to streamline your process, and consider using extension poles to reduce ladder use. These strategies will save time and improve overall cleaning effectiveness.
Conclusion
Mastering residential window washing techniques not only enhances the aesthetic appeal of your home but also prolongs the life of your windows. By understanding the right tools, methods, and cleaning solutions, homeowners can achieve streak-free results while ensuring safety and efficiency. For those looking to simplify the process, consider exploring professional services that offer expert care and convenience. Start your journey to spotless windows today by checking out our comprehensive services tailored for your needs.